Setting up an apache server on Ubuntu
A summarized process of installing an apache server.

I am a Full-Stack Developer specializing in Next.js, React Native, and TypeScript, with 3 years of front-end experience and strong backend skills. I have successfully built and deployed four web applications in production and two mobile apps on the App Store. Beyond development, I have a solid foundation in system administration and IT infrastructure, backed by a Google certification. I am also expanding my knowledge in data science and blockchain, aiming to build innovative tech solutions.

Installation
- Update the
aptpackage index:sudo apt-get update - Install the apache server:
Apache runs on portsudo apt install -y apache280by default. You might get an error such as failed to start the apache server: port 80 is occupied.
If you get such errors, you will need to free the port by killing the process using the port.
- Verify the process id(pid) using port 80:
sudo lsof -t -i:80 - Kill the process:
pid is the process id returned.sudo kill pid
If you didn't notice the error during the installation, it doesn't guarantee that the apache service started successfully. You need to verify its status using the method below.
- Using
systemctl:
You should get a similar output as shown.sudo systemctl status apache2
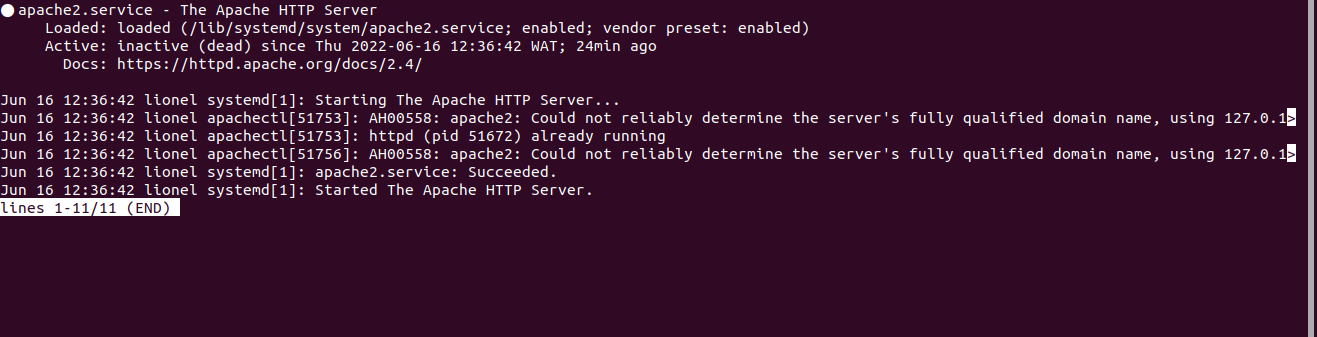
The active status of the apache is shown on line 3 (active: inactive). If you get an active status, then apache is ready to go. If you get a failed status, you need to restart the apache service using the command below.
sudo systemctl restart apache2
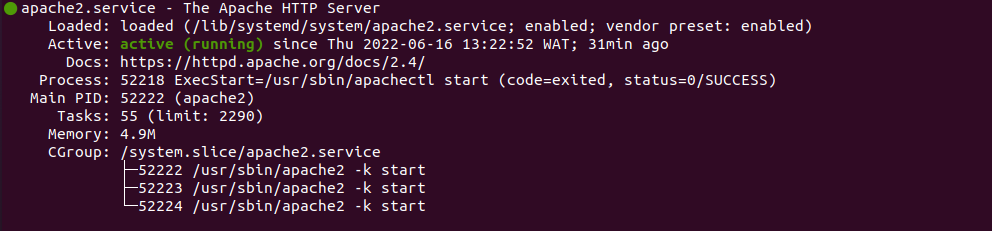
The above command will restart the apache service. You should get an active status now as shown below using:
sudo systemctl status apache2
Adjusting the firewall
Before testing Apache, it’s necessary to modify the firewall settings to allow outside access to the default web ports. During installation, Apache registers itself with UFW to provide a few application profiles that can be used to enable or disable access to Apache through the firewall.
UFW(Uncomplicated Firewall) is a program for managing a netfilter firewall designed to be easy to use. It uses a command-line interface consisting of a small number of simple commands, and uses iptables for configuration.
It is okay if you don't understand UFW at first. We only want to allow outside access to apache default web ports, and ufw happens to be a tool we'll use to accomplish that.
- List the
ufwapplication profiles by typing:
You will receive a list of the application profiles as shown below:sudo ufw app list
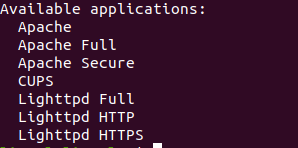
As indicated by the output, there are three profiles available for Apache:
- Apache: This profile opens only port 80 (normal, unencrypted web traffic)
- Apache Full: This profile opens both port 80 (normal, unencrypted web traffic) and port 443 (TLS/SSL encrypted traffic)
- Apache Secure: This profile opens only port 443 (TLS/SSL encrypted traffic)
Again, do not worry about the above list. We simply want to allow traffic on port 80.
- Enable port 80 using:
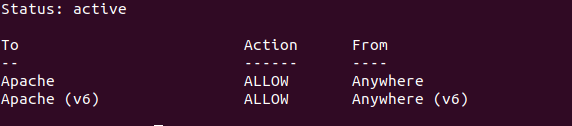
sudo ufw allow 'Apache' - Check the status of ufw:
On your list of applications, Apache and Apache(v6)'s status should be similar to the output below.sudo ufw status
- verify your local IP address:
This should show a list of space-separated IP addresses. You can try each on the browser. Your output should be similar to the one shown below.hostname -I

Apache processes
start
Start the apache service:
sudo systemctl start apache2
stop
Stop the apache service:
sudo systemctl stop apache2
reload
Reload the apache service:
sudo systemctl reload apache2
enable
Stop the apache service. This automatically starts the apache service after system reboot:
sudo systemctl enable apache2
disable
Stop the apache service.
The apache service needs to be enabled after system reboot:
sudo systemctl enable apache2
Thanks for reading. Drop your comment below. Also read How to setup an apache virtual host


